Ready to stop missing critical messages? Implement a visual priority system now. Use built-in tools to mark urgent items. Create a predictable workflow that scales with workload.
Microsoft supplies six default options for rapid labeling. Assign a specific category to any incoming email to make priority items stand out in the primary inbox. This reduces time spent searching and cuts the risk of missed deadlines.
Follow a standardized tagging method—assign, review, act. Apply the category as soon as a message arrives. Then sort and filter by that tag to surface urgent tasks.
Maintain high productivity—use the native framework to enforce discipline. The system enables quick identification of items that require immediate attention and ensures every important message gets tracked.
Key Takeaways
- Use the built-in labels to create a repeatable priority workflow.
- Assign a category on arrival to make urgent emails visible.
- Leverage the six default options for fast setup.
- Filter and sort the inbox to surface high-priority items.
- Standardize the process to reduce missed deadlines.
Understanding the Power of Color Coding
A fixed palette of six visual markers enables rapid classification of messages and calendar entries.
Apply a consistent system of color categories to create instant context. The six default markers map to mail, calendar, and tasks. Each marker acts as a visual tag—no need to open the message to understand urgency.
Use a red category for high-priority items that require immediate action during the workday. Assign that marker on arrival to force immediate triage. Repeatable assignment reduces missed deadlines and speeds decision-making.
Combine markers on a single item to track cross-functional projects. Multiple tags allow tracking across teams, phases, and priority levels without duplicating content.
- Visual markers classify items across modules.
- Consistent application enforces a predictable workflow.
- Multiple tags increase project-tracking flexibility.
How to Use Outlook Categories Color Code Effectively
Identify the interface version before applying visual labels.
Confirm whether the environment is the new outlook or the classic ribbon. Follow steps to identify the client. The new outlook places label settings at Settings > Accounts > Categories. The classic build exposes label controls in the Tags group on the home tab.
Use the web view for quick assignment when working in outlook web. The web interface offers streamlined options to assign a color category to incoming messages. The ribbon remains visible while composing or viewing messages in the desktop app—use it for fast tagging.
Benefits of Visual Markers for Priority
- Scan the inbox and locate priority items faster.
- Apply a single category per email to mark status or owner.
- Keep labeled items in any folder for consistent sorting and search.
| Interface | Location | Primary Action |
|---|---|---|
| New Outlook | Settings > Accounts > Categories | Assign color category via settings or message options |
| Classic | Home tab — Tags group | Click categorize on the ribbon to label messages |
| Web | View > Message options | Use streamlined options to tag incoming items |
Setting Up Your Custom Category List
Transform vague default labels into precise workflow identifiers for every team. Rename generic names to reflect roles, projects, and deadlines. This step reduces ambiguity across multiple accounts and folders.
Renaming Default Categories for Clarity
Open the settings menu and locate the category list dialog box. Select a default category name. Edit the name field. Save the change.
To add a new category — select new category. Pick a color and enter a unique category name. Confirm in the dialog to make the label available in the account.
- Replace generic names with task-specific labels.
- Use the dialog to manage the full list across accounts.
- Save changes so the new color category appears everywhere.
| Action | Location | Result |
|---|---|---|
| Rename default category | Settings > Category list | Clear, descriptive label |
| Create new category | Settings > New category | Selectable color category in the box |
| Save changes | Dialog box | Synced across accounts |
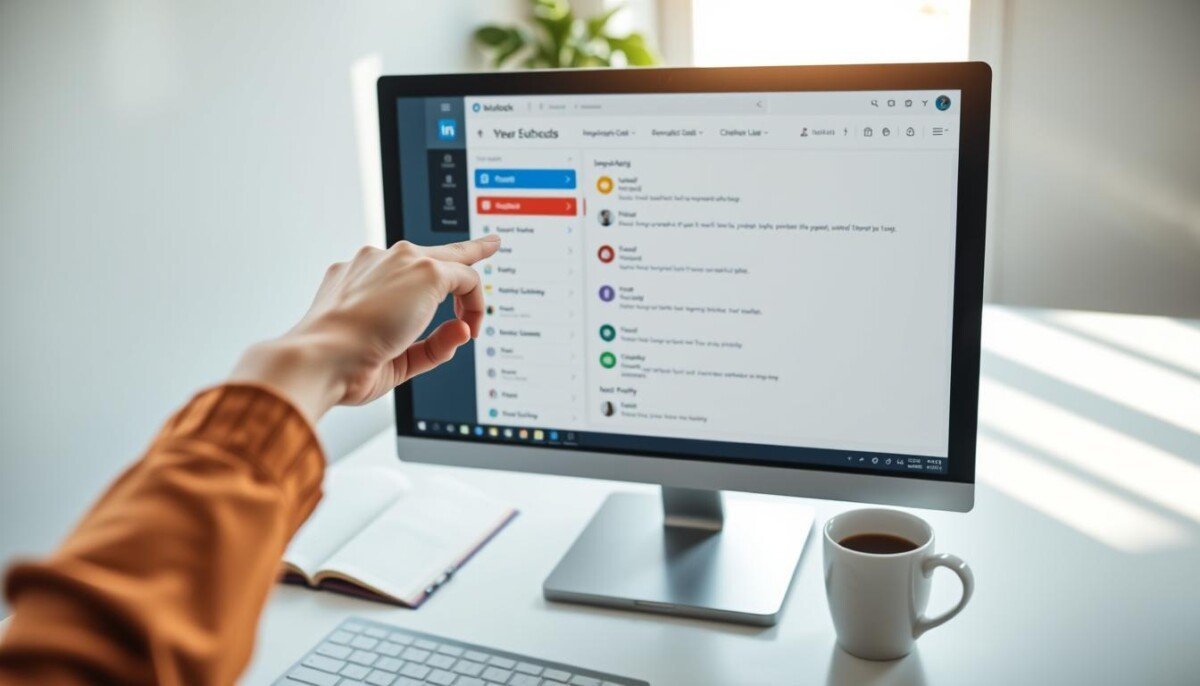
Assigning Categories to Your Incoming Messages
 visually represented through colored paper slips next to laptops. In the background, large windows allow soft, natural light to fill the room, creating an inviting atmosphere. The angle captures the dynamics of teamwork and collaboration, while maintaining a sense of professionalism and productivity. The mood is focused and organized, reflecting the efficient color-coding system in action.")
Right-click any incoming message to tag it for fast retrieval.
Right-click the message in the list. Use the context menu to select category and apply the correct label. This method works in the new outlook and in the classic view.
Right-click the blank space to the right of the sender name for reliable access to options. Use the Home tab and click categorize when the message is open in the reading pane or a separate window.
- Right-click message — choose the desired label from the menu.
- Home tab — click categorize for open messages.
- Ensure consistent label selection to keep all items searchable.
| Action | Location | Result |
|---|---|---|
| Right-click message | Inbox message list | Immediate label applied to the email |
| Right-click near sender | Sender name area | Quick access to categorization options |
| Click categorize | Home tab on ribbon | Apply or change color category for open messages |
Managing Categories Across Different Outlook Versions
Centralize category settings so every account reflects the same labels and names.
Desktop Application Interface
Open the settings menu in the desktop app. Use the dialog box to rename generic names. Save changes to propagate the updated category list to the local profile.
Follow steps—edit name, confirm, and sync. Use the ribbon control to select category when labeling an open message.
Web-based Platform Navigation
Access outlook web to verify the same category list appears in the browser view. Use the account settings to manage the list for each connected account.
Assign labels from the message options. The web view exposes the same options used in the desktop dialog box.
Syncing Across Devices
The New Outlook syncs categories across devices. Maintain consistent settings to ensure the category list and color categories match on phone, desktop, and web.
- Follow steps in settings to enable sync.
- Confirm new category entries appear in the account list.
- Test assigning a color category in the inbox to verify propagation.
| Platform | Location | Primary Action |
|---|---|---|
| Desktop | Settings > Category list (dialog box) | Rename, create new category, save |
| Web | Settings > Accounts > Categories | Manage list, assign category from message options |
| Mobile | Account settings > Sync | Receive updated category list, assign on the go |
Streamlining Workflow with Quick Click Settings

Enable Quick Click to label messages directly from the message list with a single action.
Open the settings and set the default category name. Click the category column in a table view to apply the default category immediately.
Configure the default color in the settings to align the default category with team conventions. This reduces manual steps and speeds triage.
- Assign a default color category to messages with one click in the inbox table view.
- Pick a specific category name to make the next category applied predictable.
- Process high-volume messages from a single sender faster—no open required.
| Action | Location | Result |
|---|---|---|
| Enable Quick Click | Settings > View options | Single-click assigns default category |
| Select default category name | Settings > Categories list | Next category matches workflow |
| Use table view | Inbox or folder list | Rapid organization of items without opening messages |
Organizing Your Inbox with Sorting and Filtering
Create persistent search views that surface every item tagged for a project.
Establish Search Folders to collect all items that share the same category. Use the dialog box to pick the account and the specific label to include.
Sort the inbox by the category column to group related messages. This view exposes high-priority threads and reduces manual triage.
Creating Search Folders for Specific Categories
Open the new Search Folder dialog. Select the filter that matches the desired color category. Save the folder for a persistent view across sessions.
- Sort items by category to see related email in one pass.
- Filter to isolate a red category or any other label for focused review.
- Use Search Folders for ongoing project management—results update dynamically.
Filter the inbox by sender to ensure no priority messages slip through. Confirm the folder view and test the selection on the account before deployment.
| Action | Location | Result |
|---|---|---|
| Create Search Folder | New Search Folder dialog | Persistent list of matching items |
| Sort by category | Inbox view — tab column | Grouped related messages for fast triage |
| Apply filter | Folder or view settings | Isolate red category or specific sender |
For full setup steps, consult the guide to create and assign color categories.
Advanced Search Techniques for Categorized Items
Type targeted commands into the search field to isolate labeled messages instantly.
Use the prefix category: followed by the label name. Example — category:ProjectX. This returns all matching items across the inbox and folders.
Apply queries in the new outlook and in the web view. Both support the same search syntax. This enables consistent retrieval on desktop and browser.
- Enter category:name to locate any category email or item.
- Combine with sender or date filters to narrow results.
- Create saved searches when the same query runs repeatedly.
The dialog box for new Search Folders provides fine-grain options. Select the category list entry in the dialog box. Then set scope — single folder or account-wide. Save the folder to generate an always-updated view.
| Query | Target | Result |
|---|---|---|
| category:Name | All items | Finds tagged messages and tasks |
| category:Name from:sender | Inbox | Filters by sender and label |
| category:Name before:YYYY/MM/DD | Folder | Limits by date and tag |
Troubleshooting Common Category Display Issues
Missing tagging controls commonly result from a customized ribbon or a disabled add-in.
Right-click the ribbon. Select Customize the Ribbon. Restore the Home tab to reveal the click categorize control.
If the button remains inactive—repair Microsoft Office using the built-in repair utility. Follow steps in the installer to run a quick repair. Run online repair if issues persist.
The dialog box for managing labels allows deletion of unused entries. Open the category list dialog box. Remove obsolete names to keep the list organized.
IMAP accounts may not support native tagging. Create shortcuts in a supported account. Use those shortcuts to assign color category values to copied items.
- Verify settings for default category and default color.
- Confirm the category name matches across accounts and web views.
- Restore the Home tab so users can reliably click categorize.
| Issue | Check | Action |
|---|---|---|
| Categorize button missing | Ribbon customization | Right-click ribbon → Customize the Ribbon → Restore Home tab |
| Button inactive | Add-ins / install | Run Office repair utility |
| Tags not applied on IMAP | Account support | Create shortcuts in supported account to tag items |
Maximizing Your Productivity with Visual Organization
Adopt a visual tagging strategy to turn an overflowing inbox into a manageable task list.
Implement a consistent color categories system. Apply tags at arrival. Triage immediately. This reduces context switching and speeds decisions.
Use the settings menu as the control point for the system. Standardize names in the dialog box. Sync changes across devices to maintain one source of truth.
Group related items into a single folder view. Create saved searches for frequent queries. Keep the inbox focused—only task-ready items remain.
Enable these practices in the New Outlook to enforce a predictable workflow. Track results and iterate the settings to sustain long-term efficiency.