
Ready to turn raw footage into shareable videos that look professional? This guide walks you through the first project so you can edit with confidence.
You will learn how to import media, arrange clips on the timeline, and apply text and effects to lift your content. The steps cover audio balance, smooth transitions, and export options so your final file meets platform needs.
The goal is to save time while improving quality. Whether you use the desktop app or a mobile workflow, these clear steps help you manage your library and tools without guesswork.
Follow the guide and you can craft a polished video that serves your brand and stands out on social media. If you hit upload issues, our tips and a linked resource explain how to check codecs, formats, and upload limits: export and upload guidance.
Key Takeaways
- Start fast: Import footage and build a project in minutes.
- Use the timeline: Trim clips and add transitions for flow.
- Balance audio: Adjust sound and add music safely.
- Apply effects: Text overlays, filters, and color tweaks add polish.
- Export right: Choose the correct format and resolution for social media.
- Templates and motion tools speed up consistent edits.
Understanding the CapCut Video Editor
The editor packs professional tools into a clean workspace so you can shape clips quickly.
Why it matters: The platform combines a simple layout with advanced features. You import media, build a project, and move clips on a timeline with clear buttons and shortcuts.
Launched globally in April 2020, the app rose fast by offering pro-grade effects without a steep learning curve. The subscription unlocks premium assets; the Pro Plan is $19.99/month or $179.99/year.
- Manage footage in a searchable library.
- Balance audio and add music or background sound.
- Adjust color, apply filters, and use transitions.
- Speed up edits with templates and ready assets.
| Area | What it does | Business benefit |
|---|---|---|
| Media Library | Store clips, images, and audio | Saves time locating assets |
| Tools & Features | Color, filters, effects, keyframes | Polished, on-brand videos |
| Export Options | Multiple formats and resolutions | Fits social platforms and file needs |
Getting Started with Your First CapCut Tutorial for Beginners
Install the official app from the store and open a new project to begin. Grant permissions so the app can access your media and camera roll; this makes imports seamless.
Mobile Setup
After download, tap the button to start a project. Import your video clips into the library and organize footage before you edit.
Drag clips onto the timeline, trim them, and add simple text, music, or basic effects. Use the preview panel to watch changes in real time.
Desktop Installation
The desktop app provides advanced tools for multi-track editing and fine audio control.
Install the desktop version, open a new project, and import the same media files. Manual saves are wise during long edits. Choose the proper resolution and file options so your final video exports cleanly for social sharing.
- Download the latest stable build.
- Create a new project and set resolution.
- Import clips to the library and preview edits.
Navigating the Editing Interface
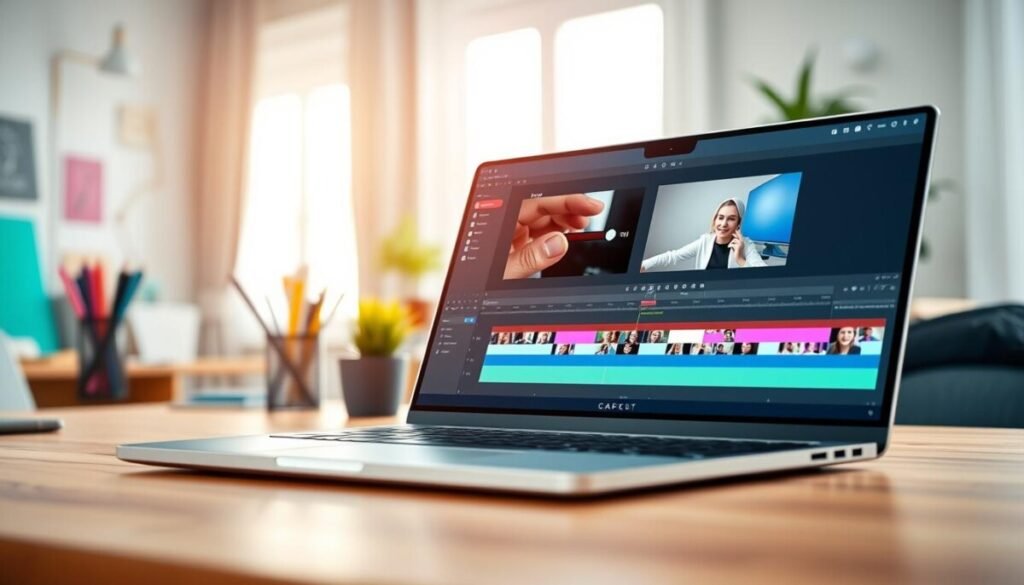
Find the preview at the center to watch your video clips and check edits in real time.
The timeline sits at the bottom and acts as your main workspace. Drag clips into place, layer audio and text, and set transitions between segments.
The main toolbar gives quick access to core tools like cut, trim, and split. Sub-toolbars appear when you select a clip, offering filters, color adjustments, and motion options.
Use the library panel on desktop to manage media, stock videos, music, and templates. This keeps footage and assets ready when you need them.
The properties panel lets you tweak color, change speed, or adjust audio levels precisely. Layer tracks on the timeline to combine overlays, sound, and effects for a richer result.
- Shortcuts speed up edits — split, trim, and move clips fast.
- Toggle tracks to hide or show elements while you refine edits.
- Use templates and presets to keep content consistent across projects.
| Area | What to use it for | Quick tip |
|---|---|---|
| Preview Window | Monitor frames and timing | Play at 1x then slow for fine checks |
| Timeline | Arrange clips, audio, and transitions | Use snapping to align cuts precisely |
| Library Panel | Store media, music, and templates | Tag assets by project for fast access |
Master the layout and you spend less time hunting for features and more time shaping your project. Familiarity with these tools prepares you for advanced edits and faster exports.
Importing Media and Managing Projects
Bring together clips, images, and audio in one place to speed up each editing step. Start a new project and import multiple files at once so you can begin faster.
Organizing the Library
Create folders in the library and label footage by scene or topic. Group similar clips and mark the best takes so you find them quickly during a long edit.
Drag and drop a clip onto the timeline to build your sequence. You can replace a clip without losing edits, which makes A/B testing versions easy.
- Use the desktop import window to add high-quality videos and royalty-free music.
- Tag files with keywords, like background music, sound, or image, for fast search.
- Save project drafts often so you can pause and resume without risk.
| Action | Why it helps | Quick tip |
|---|---|---|
| Import multiple files | Saves setup time | Use batch select in the desktop import window |
| Group & label | Keeps large projects tidy | Create folders by scene or asset type |
| Replace clips | Tests versions without redoing edits | Right-click on timeline clip to swap source |
Essential Techniques for Trimming and Splitting Clips
Trim and split clips to tighten your story and remove slow or unwanted moments.
Start by dragging a clip’s edge on the timeline to shorten the start or end. This removes dead space quickly and improves pacing.
Use the split tool to cut a clip into two parts. Once split, you can insert new content, apply different effects, or delete the middle section without disturbing neighboring clips.
The timeline shows where each clip begins and ends. Zoom in when you need frame-perfect accuracy. You will see the split icon or scissors button near the playhead.
Ripple trimming moves adjacent clips automatically when you shorten a clip. That prevents gaps or black screens and keeps your project flowing.
- Trim edges to remove slow bits at the start and end.
- Split to isolate moments and add transitions.
- Delete unwanted segments to keep the timeline clean.
Practice these steps to highlight key moments and keep viewers engaged. If you have upload or export problems after edits, check our export and upload guidance at export and upload guidance.
| Technique | When to use it | Quick result |
|---|---|---|
| Edge trim | Shorten start or end of a clip | Tighter pacing; no dead time |
| Split/cut | Separate a clip for different effects | Flexible edits; targeted effects |
| Delete middle segment | Remove mistakes or pauses | Smoother narrative flow |
| Ripple trim | Maintain timeline continuity | No gaps; ready-to-export project |
Enhancing Visuals with Filters and Transitions

Small visual choices—like the right filter and a clean transition—can turn a good video into a great one. These adjustments help your content feel consistent and cinematic without extra work.
Applying Transitions
Place transitions between clips on the timeline to smooth scene changes. Use built-in templates to save time and keep a consistent flow.
Tip: Adjust the timing of each transition to control pacing. Short cuts keep momentum; longer fades add emotion.
- Choose a transition that matches pace and content.
- Preview edits in real time to check rhythm.
- Revisit and tweak transitions after adding music or other effects.
Using Filters
Apply filters to set mood and unify color across multiple clips. Start with subtle adjustments to avoid over-styling your images.
Mix filters with small color tweaks and contrast changes to match your brand and the background music. You can remove or change a filter at any time.
| Feature | Best use | Quick tip |
|---|---|---|
| Transitions | Smooth scene changes | Short for pace; long for mood |
| Filters | Set color and tone | Use same filter for related clips |
| Preview | Check edits in real time | Play full sequence before export |
Working with Text and Captions
Add clear, branded titles and captions to guide viewers through your video.
Use the text tool to place titles, subtitles, and watermarks on any clip. Customize fonts, colors, and size to match your brand in one simple step.
The auto-caption feature converts audio into subtitles using AI, saving you time on manual transcription.
Adjust the duration and position of each text block on the timeline so it appears precisely when needed. You can also change transparency to create subtle watermarks.
- Animate text with entrance and exit effects to add motion.
- Use text tracking to follow moving objects for a polished look.
- Batch edit captions to keep consistency across all videos in a project.
Tip: Test captions with sound off to ensure clarity. These features improve accessibility and help your message land on social feeds and desktop viewers alike.
Mastering Audio and Sound Effects
Clear, balanced sound makes your video feel professional and keeps viewers focused.
Start by adding background music and sound effects from the stock library. Pick royalty-free tracks to avoid copyright strikes on platforms like YouTube.
Use the volume tool to balance music and dialogue. Lower the background track so the voice remains clear. Trim and split audio on the timeline to match cuts and motion.
Voice Isolation
Voice isolation uses AI to reduce room noise and boost clarity. Apply it when a clip has hiss, wind, or ambient distractions.
- Extract audio from a clip to edit voice and effects separately.
- Use reduce-noise to damp hum or constant background sound.
- Adjust audio speed or fade points to sync speech with visual cues.
| Action | When to use | Result |
|---|---|---|
| Voice isolation | Noisy location clips | Cleaner dialogue |
| Layer music & effects | Montage or transitions | Richer soundscape |
| Extract audio | Precise sound edits | More control on the timeline |
Tip: Manage multiple audio tracks to combine music, voiceovers, and sound effects without masking speech. This approach keeps your videos engaging and professional.
Need tools to polish spoken audio further? See recommended podcast editing tools to learn more about noise reduction and mastering workflows.
Utilizing Overlays for Creative Effects

Overlays let you layer extra videos, images, or text above your main clip to craft richer story moments. Use this to build picture-in-picture scenes that perform well on social media.
Add an overlay track on the timeline, then drag a secondary clip or image into place. Trim, split, or change the volume of that clip to match the main shot and your audio mood.
Use mask and split-screen features to show multiple videos side by side. The chroma key tool removes green screens so you can place subjects in any background.
Apply subtle effects and motion to overlays so they stand out without distracting. Add slight drop shadows or borders to separate layers visually.
- Align overlays with guides to keep framing tight across clips.
- Use sound effects and muted audio on secondary tracks to avoid masking dialogue.
- On desktop, revisit overlay edits quickly to test different layouts in the same project.
Mastering overlays expands your creative options and helps you produce polished videos that capture attention and drive engagement.
Applying Keyframes for Motion and Animation
Set keyframes to control motion, scale, and opacity so your video feels alive.
Start a new project and select a clip on the timeline. Click the keyframe icon at the playhead to mark the first state.
Add a second keyframe later on the timeline and change position, rotation, scale, or opacity. The software interpolates between points so motion looks smooth.
Use multiple keyframes to map a path or control speed. You can create zoom-ins, pans, or trendy rotation effects with just a few markers.
Open the graph or curves view to ease motion. Soft easing prevents robotic moves and gives your clips a natural flow.
- Apply keyframes to text and overlays to animate titles and logos.
- Practice on a simple image before moving to long video clips.
- Adjust or delete keyframes anytime to refine timing and effects.
Tip: On desktop, zoom the timeline for frame-level control. With practice, keyframing lifts basic editing into professional motion design.
Leveraging AI Capabilities for Faster Editing
AI tools now shorten editing time by generating scenes and assets from simple prompts. Start a new project and let the AI build a base timeline you can refine.
AI Video Maker
Veo 3.1 and Sora 2 generate realistic video clips from short prompts. Use them to create B-roll or full scenes, then place the clips on your timeline and polish cuts.
Auto Captions
The auto-captions tool converts audio to text quickly and supports more than 10 languages. This helps your videos reach wider audiences on social media and improves accessibility.
Background Removal
Smart background removal isolates subjects so you can add new backdrops or motion effects. Combine this with Seedream 4.0 text-to-image assets to craft thumbnails and overlays.
- Use AI text-to-speech to add narration when you need a professional voice fast.
- Run automatic translation to generate multi-language captions.
- Let AI handle routine edits so you spend time on creative choices.
| Tool | Best use | Output |
|---|---|---|
| Veo 3.1 / Sora 2 | Generate realistic scenes | High-quality video clips |
| Seedream 4.0 | Text-to-image thumbnails | Custom images for thumbnails |
| Auto Captions & Translator | Subtitles and translations | Multi-language text tracks |
Tip: Use these features on desktop for faster batch processing and then finalize color, text, and effects before export.
Adjusting Speed and Reverse Effects
Speed adjustments and reverse effects let you reshape time to highlight key moments in your video. Use capcut to pick between normal speed and curve speed modes and get the look you want quickly.
Use the normal speed modifier to speed up or slow a clip at a constant rate. This gives a steady feel that works well for fast cuts and time-lapses.
Switch to speed curves to create velocity ramps and dramatic motion. Add key points on the graph to ease into fast sections and back to slow frames.
- Pitch toggle: keep audio natural when you change speed.
- Reverse effect: create rewinds, restore motion, or craft playful transitions.
- Graphs: smooth ramps so effects feel professional.
Apply these changes directly on the timeline to any clip. On desktop, you get finer graph control for frame-perfect ramps.
Tip: Use slow motion to emphasize action and fast speed to punctuate beats. Mastering these tools adds motion and creative flair to your videos.
Optimizing Video Quality and Color Correction
A consistent color grade lifts raw footage into a polished final video.
Start with automatic color correction to balance exposure and tint across clips. Apply the auto tool to the whole timeline, then tweak individual clips when needed.
Use the desktop AI upscaler to boost resolution and sharpen low-quality video. This helps when you mix phone footage with higher-res clips in one project.
Balance visuals and audio together. Lower background music and check sound effects so dialogue remains clear after color changes.
- Apply to all: Use batch grading for consistent look.
- Fine-tune: Adjust saturation and contrast per clip.
- Canvas: Add background color or images to remove black bars.
| Method | Best use | Result |
|---|---|---|
| Auto correction | Quick balance | Consistent videos |
| Manual grade | Brand style | Custom look |
| AI upscale | Low-res clips | Sharper final video |
Tip: Save presets once you like a grade. Reusing them speeds up future projects and keeps your videos cohesive.
Exporting and Sharing Your Content
When your timeline is ready, the export step packages your clips, audio, and effects into one deliverable file. This final action turns your work into a shareable video that fits platforms and goals.
Choosing Resolution and Format
Pick a resolution that matches the platform. Use 1080p for most social media and 4K when you need extra detail.
Select a format like MP4 or MOV to keep compatibility across devices. Check audio settings and bitrate so sound stays clear.
- Click the export button and confirm resolution and aspect ratio for YouTube, TikTok, or Instagram.
- Choose MP4 for wide compatibility or MOV for higher-quality masters on desktop.
- Download the final file to your device or share directly to your preferred social media account.
Tip: Export a short test clip first to verify format and playback. For a step-by-step reference, see the capcut guide.
Conclusion
Final tip, the steps in this guide make video editing faster and more consistent. With practice you will move from rough clips to a finished product that reflects your brand and voice.
You have learned how to manage media, apply creative effects, and use AI to speed work. Pay attention to text, transitions, and audio to shape mood and clarity in each video.
Keep experimenting on desktop and mobile to refine your workflow. If you want comparisons of advanced tools, see AI-powered video editing tools for ideas and next steps.
Thank you for reading. Practice often and share the great videos you create.